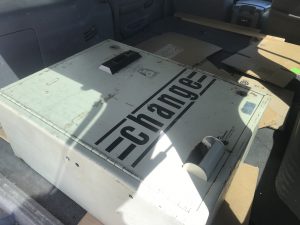
Speed Queen Washer Shock Absorber Change
Over time the shock absorbers in the Speed Queen / IPSO soft mount washers will wear out. At this point, they become just a set of springs.
You will notice more out of balance concerns and the high extraction speeds are not reached. In some cases you may hear some vibration and even the washer door rattling during the spin cycle.
So it’s time to change the shocks but how do you do it. Personally, I didn’t bother with the manual and just figured out a way that worked for me.
** This repair requires the use of a number of tools, moving of the washers and other tasks that involve strength and dexterity. There are also some sharp edges on the covers and other areas. If you are not comfortable doing this repair hire a professional. This post is to provide a guide to the method I have used and is no guarantee that you will be able to complete the repair yourself. . The manufacturer and/or service techs may suggest and use another method. Disconnect all power and utilities before working on the machine**

I also only change the lower part of the shock as the upper part is only a smooth rod.

The first thing you need to do is get the washer to a point that you can access all of the sides easily. Mine are mounted on sturdy bases but many of them are bolted together so I have to move the washers. You will also need to access the mounting bolt on the bottom of the machine so unless there is a place to reach into the base the washer will need to move at least partially off the base.
I have some metal channel that I use that is high enough for the leveling bolts to clear the frame. Use a prybar to tilt the washer and slide the channel underneath. Once the channel is under the washer it is easy to tip the washer back to level and push the channel under the back of the machine.
When the washer is in the position shown below the front shocks can be changed. This is a good starting point as the washer will remain stable between the other washers.

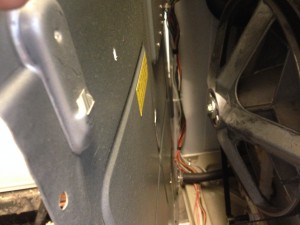
The shocks are located in each of the 4 corners. The shiny vertical tube in the picture below is the lower part of the shock absorber.
The support does not normally need to be removed to replace the shock.

Remove the nut from the bottom of the shock. This is found on the bottom of the washer. There is also a rubber mount and washer.
Below is the method I use that probably isn’t recommended by the manufacturer. I use a 2″ x 4″ about 4′ long to push the washer drom away from the shock I am working on.
**This is a tricky part as it takes a good amount of strength to push the drum up, push up on the lower part of the shock to compress the internal springs and pull the stud on the bottom of the shock out of the hole and towards the front to remove it from the washer.
You also need to be careful of the motor, wiring and control boards.

Once the lower shock is removed you will notice the plastic end will be worn and/or broken and there is oil on the part.


With the cart in place hold it securely, or use some assistance, and slide the washer forward on to the cart.
Use caution to keep the balance as the washers are heavy. Removing the lower front cover helps to provide a place to grab if needed and prevents damage to the cover. You will also need access behind this cover to remove the front shocks.

When the washer is moved out it allows access to the connections on the back. In some cases, these can be removed before moving the washer. Use caution not to cut or stretch the hoses or wiring.

I have used this method to relocate washers inside the store as well. Some machines may see a lot more use than others so you may want to rotate them around the store.


Next, we need to access the rear shocks. This is done by removing as many screws as we can to get easy access but leaving enough in place to hold the washer together.


The motor and drive belt can be seen once the covers are opened up. Use caution around the motor and wires when lifting the drum to remove the shock.

Follow the same method to replace the rear shocks. Be aware that the washer may be unstable if using a cart. Extra help may be required to hold the washer steady during the repair.
Put all of the parts pack together, replace all of the screws, connect the utilities, position the washer and give it a test run.
As I mentioned at the beginning of this post. This is not a repair that everyone can do. If you are unsure or unable to complete these tasks then I hope I provided enough information for you to observe a qualified service tech and watch for the concern points.
Ken Barrett