Installing A Change Machine In The Laundromat
In the original construction on Washin Anniston Coin Laundry I installed a double, rear access change machine. This machine has 2 separate systems inside including power supplies, bill acceptors, coin hoppers, and boards. It is mounted on the wall of the locked storage area where all of the soap and other materials are kept.
This has worked well but on occasion, a bill jam would disable one side and the other side may be empty by the time I returned to the store to do collections. The result was an inconvenience to customers that had to go find change and quite possibly were not able to at night.
I don’t believe I have ever seen a bill jammed on an almost empty change machine. Maybe it’s just me but it’s almost as if it jams after about the third bill is received.
Recently I acquired a single, front access change machine. These are designed to be mounted on the wall, as it was previously.

The location I wanted to mount this change machine was in a busy area of the store and I had concerns with it sticking out from the wall. It would become a hazard to kids that may bang their heads and an inconvenience for everyone else to get around.
The wall is part of the dryer fascia wall and I had access to the back so I decided to recess it into the wall and add trim around it.
Below is a video of the before and after and some of the steps to put it in.
The first step is to get a change machine.
Check to make sure you have a power source available and that the cable or cord for the changer will be accessible at the back or near the rear edges.

Frame the opening with at least 2×4’s all the way around. Leave some clearance to install the changer as it will be covered with trim later on. I left about 1/4″ on each side and about 1/2″ to 3/4″ on top. This allowed me to catch the bottom edge when I installed it and tilt and slide it into place. Too much of a gap could cause some warping of the housing when the bolts are tightened into the frame.

Open the door and determine the hole/ bolt locations. You will need to be able to drill the holes from the outside without damaging any wiring or other components. You will also need enough space inside to install a 2″ lag bolt.
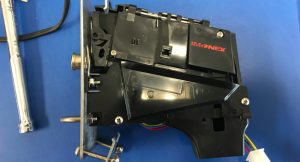
Some of the components, such as the hopper are easily removed and can be re-installed after the change machine is mounted.

Drill a small pilot hole and then the required size hole for the lag bolt you will be using. I used 1/4″ x 2″ lag bolts. If you have a thicker framing you can use longer bolts. You may consider a bolt and nut if you have access all the way around.
I installed 2 bolts on each side for a total of 8.
Another option is to install an angle iron frame around the opening and bolted to the wall and change machine.
Some samples are available at Standard ChangeMaker.

This is the view of the change machine from the back after install. The front view and explanation of the trim can be seen in the video above.

This post is a sample of a method I used to install this change machine. Refer to your manufacturers’ information for other requirements to avoid any warranty issues.
Ken
P.S. Have you checked out the PodCast yet?
It’s available on iTunes, Soundcloud and Stitcher as well as right here at LaundromatHowTo.com/Podcast


